
From cheese grater to jewelry holder; D.I.Y. Trash to Treasure.

One of the great things about being a free-spirited person, is that it also gives you the ability to see things.., as they are not, to see things with an open mind and to use that creativeness inside of you to visualize somethings ability to become something other than what it was originally intended for.
Over the past week as I have been packing for an upcoming move, I have realized how tangled my jewelry has become in my dresser drawer- a serious disaster! I always loose my earrings, well I really usually loose 1 out of a set-and we all know I’d look plenty silly walking around with mismatched earrings, (or then again, maybe you wouldn’t even notice 😉 ), and those small studs -I loose at least one every couple of weeks, which then sends me back to the store to buy another pair, that I know I will loose again in no time.
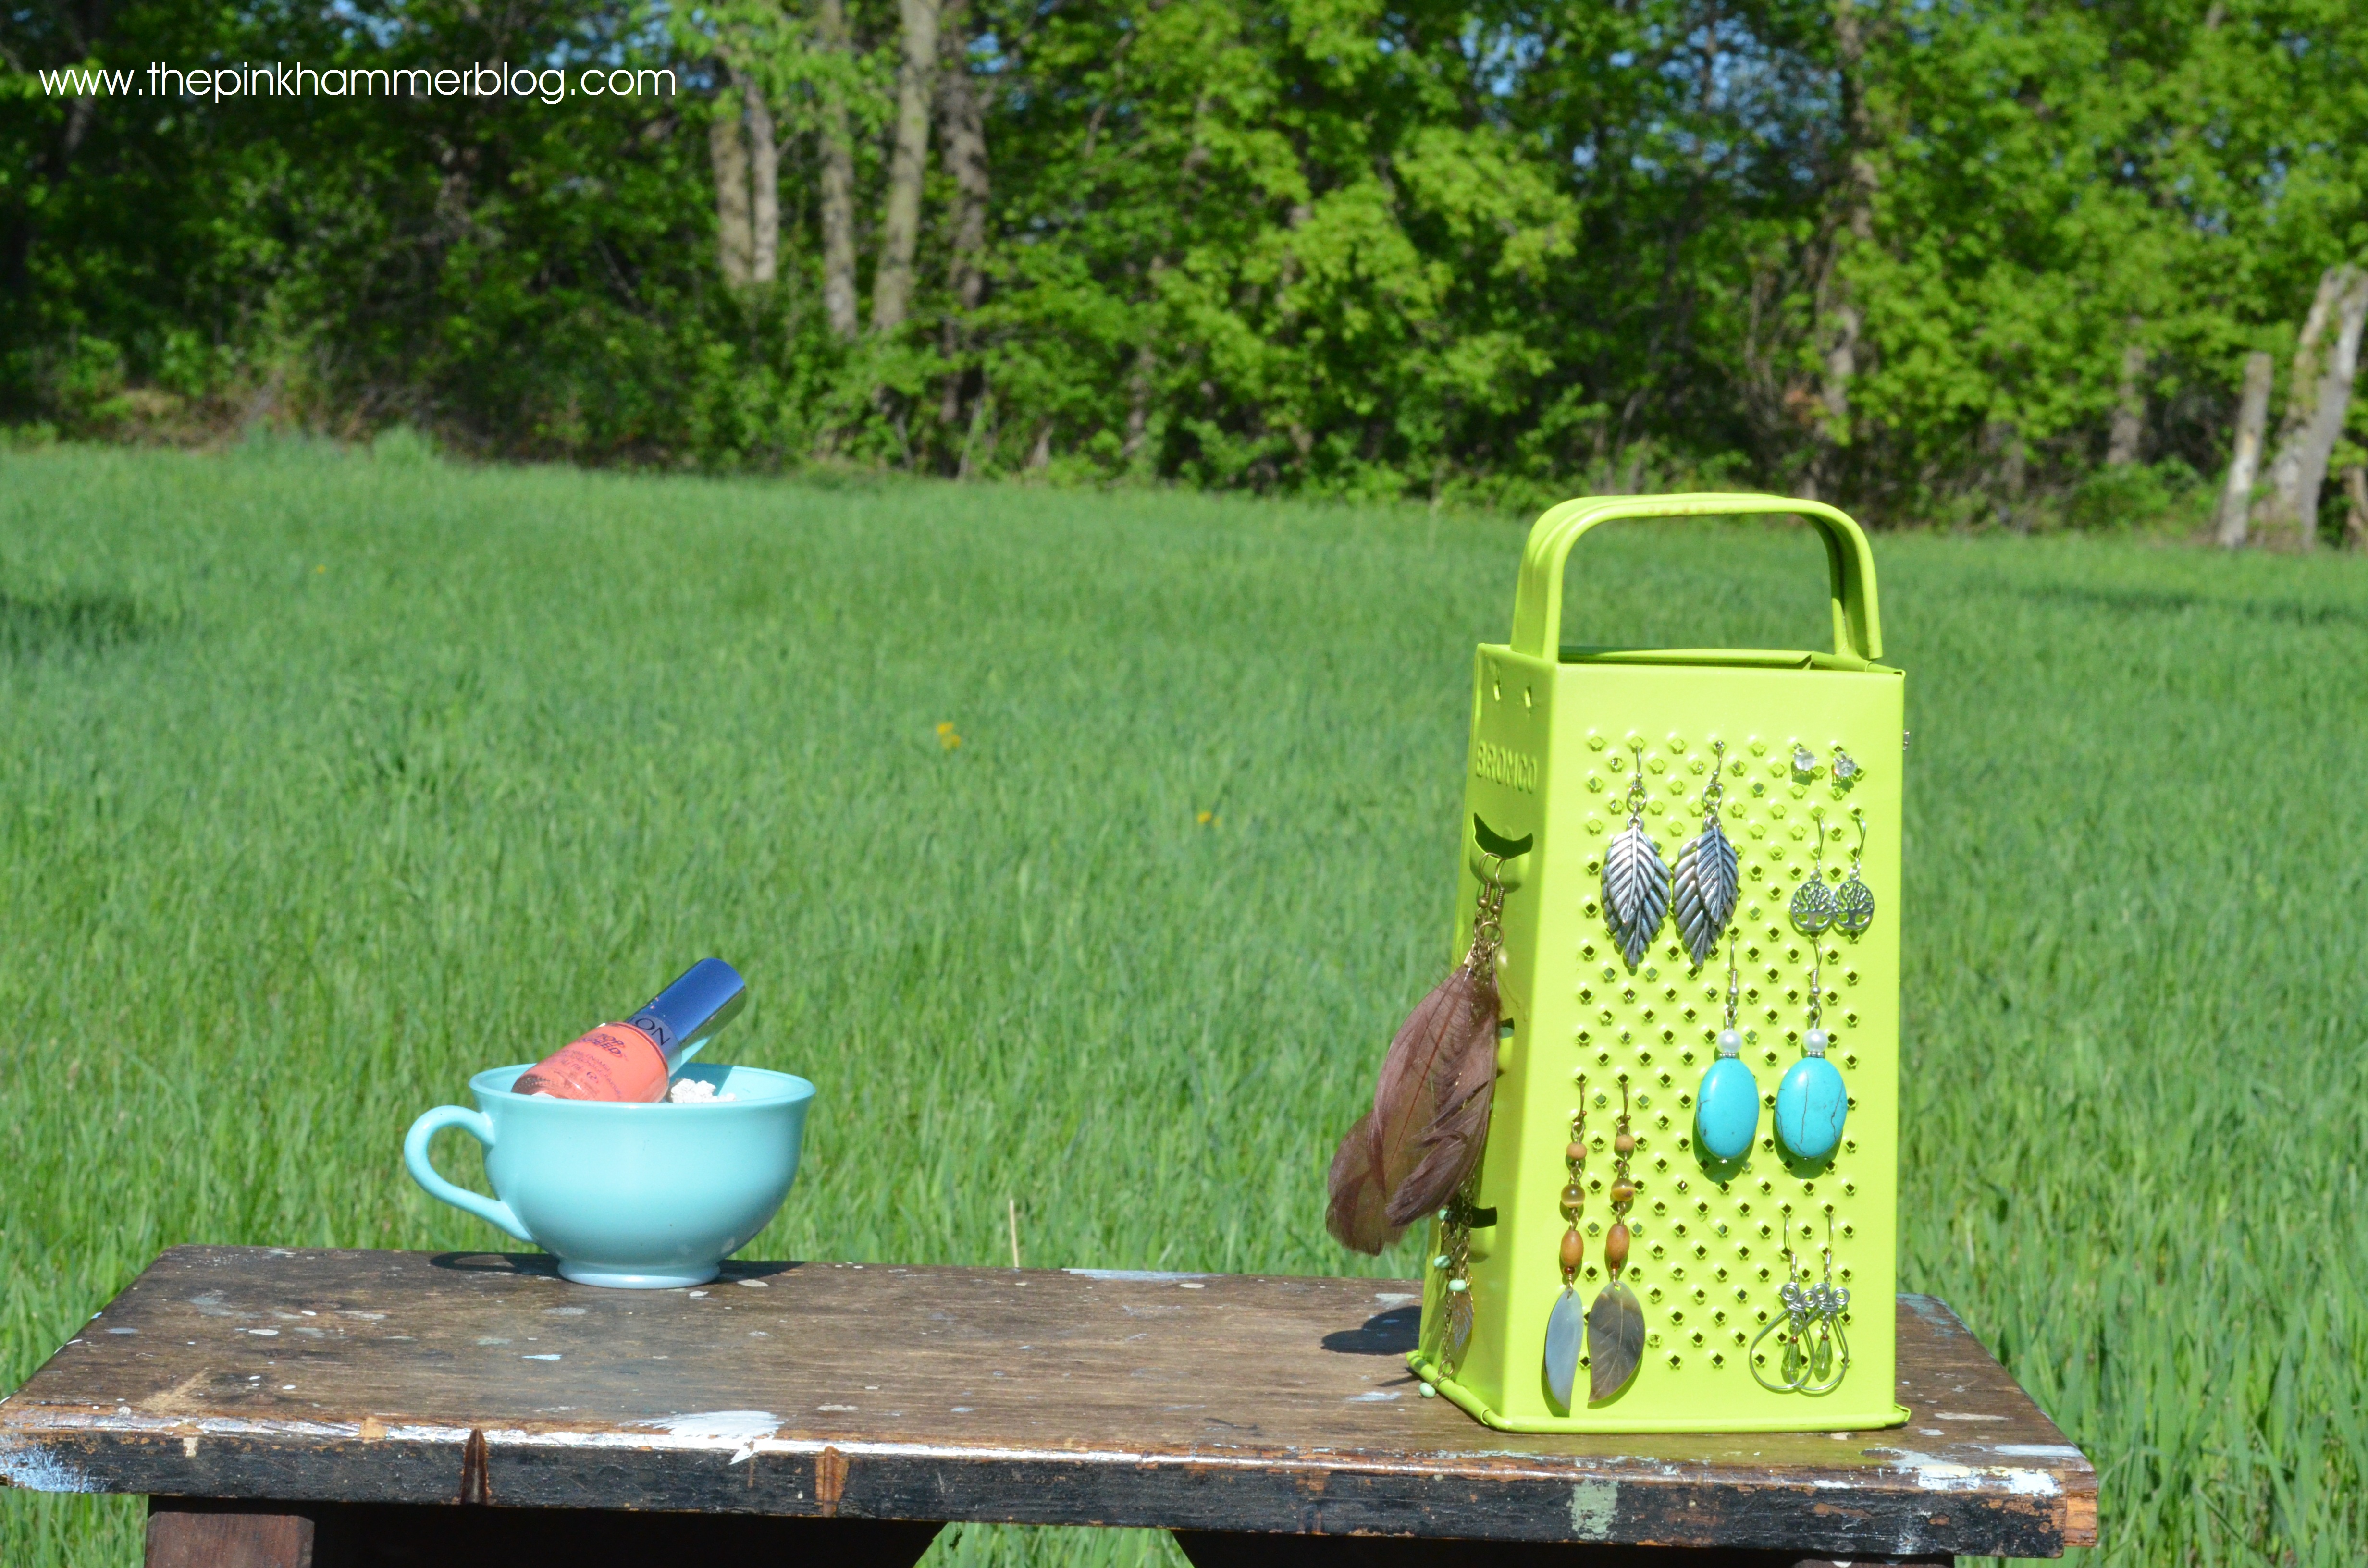
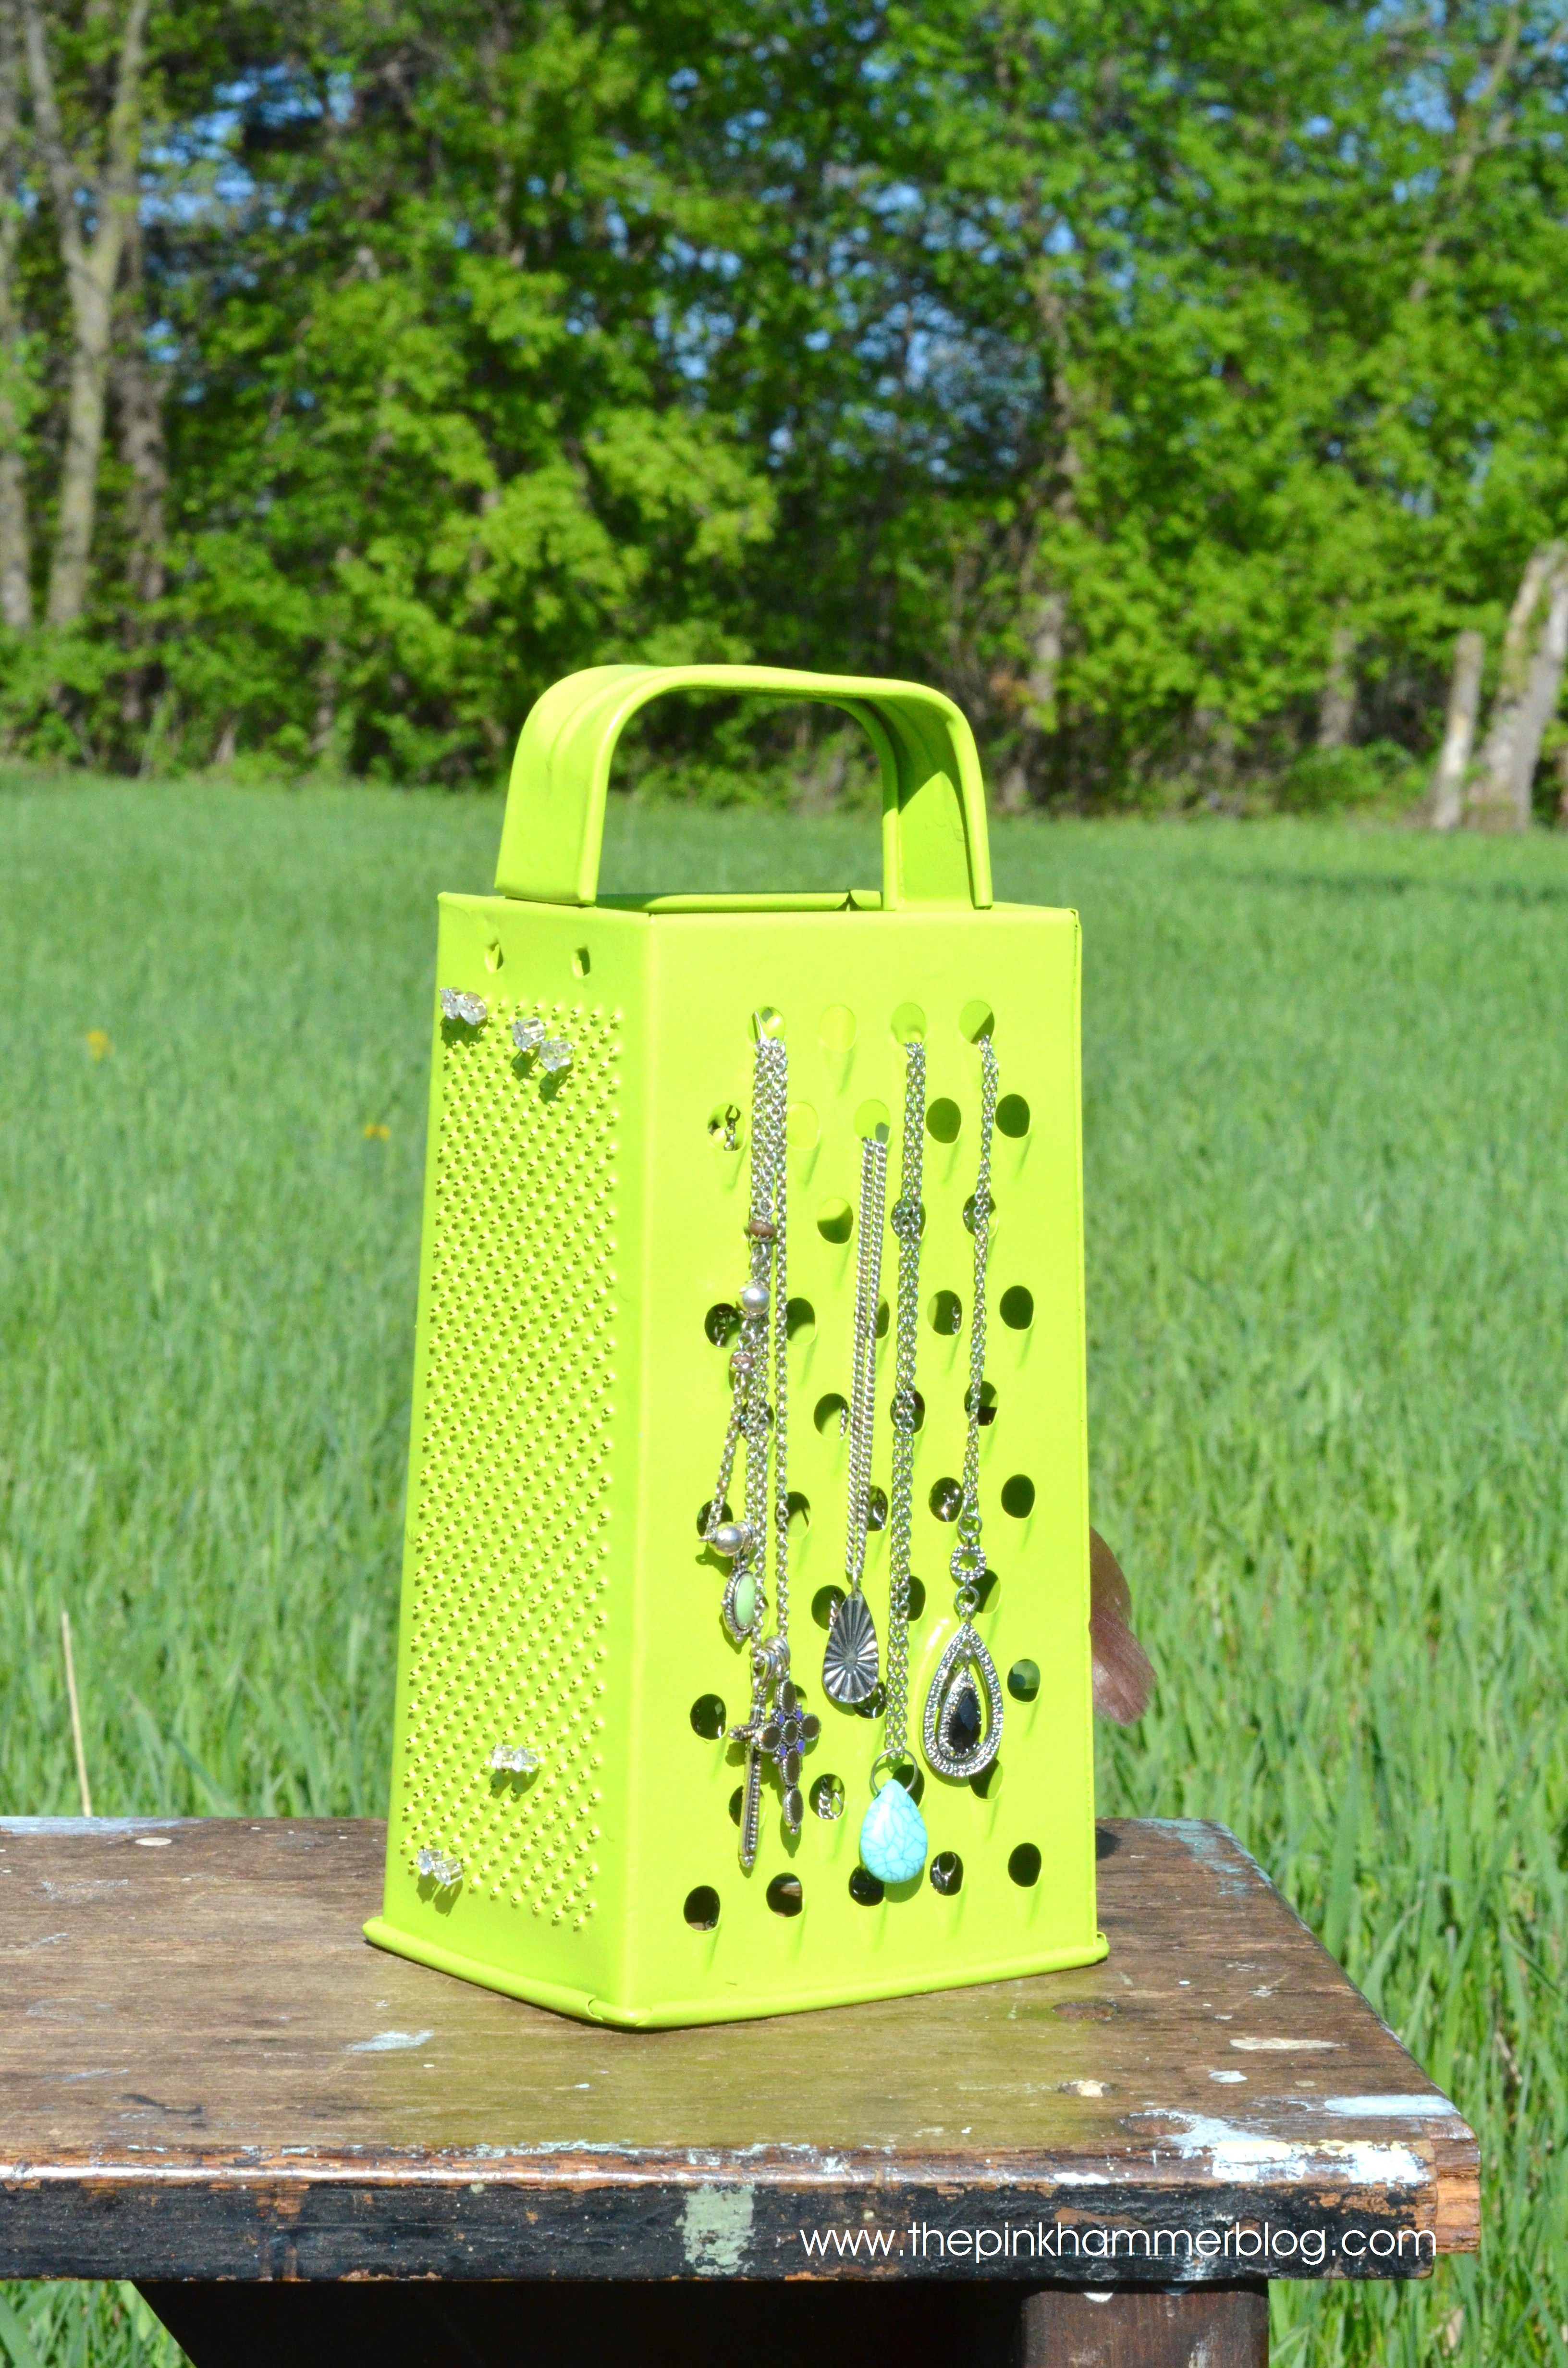
Today I decided it was time for some organization! I found an old cheese grater that was just going to be tossed away by someone else. I paired it with a can of lime green spray paint, and just like that a new jewelry holder had been born.
Here are the supplies you will need to create your own upcycled cheese grater earring holder:
SUPPLIES
- Cheese Grater (I bet you can find one for free, or under $5.00 at a thrift store)

- Can of spray paint (be creative, pick a fun color!)
- Earrings/Jewelry of course!
INSTRUCTIONS
- Wash your cheese grater with soap and water, rinse and let dry.
- In a well ventilated place, preferably outside, place your grater on a piece of cardboard and spray nice, gentle and even strokes of spray paint , making sure you cover all sides, top handle and bottom lip. Wait until completely dry, and repeat this step one more time for best coverage. At this point you can spray as much of the inside of the grater that you can reach.
- Let dry and fill your upcycled cheese grater with your favorite earrings and jewelry, using all sides to fit different sizes of jewelry.
- The best step, sit back and look at a cool project that YOU just created! Great job!


Don’t feel like making your own? Great news- you can order a custom cheese grater earring holder, for just $25.00, just contact Kelly at thepinkhammerblog @ hotmail.com to order!
I hope you enjoyed this fun upcycle project! Check back next week for some great snack ideas to take along on camping trips with kids!
Make sure you hop on over and follow The Pink Hammer on Facebook for daily inspiration and tips!
Thanks for reading,
~Kelly
