“In my garden there is a large place for sentiment. My garden of flowers is also my garden of thoughts and dreams. The thoughts grow as freely as the flowers, and the dreams are as beautiful. ” ~Abram L. Urban
Oh, sweet Summer time. The sounds of bees buzzing around the yard and the laughter of children fill the air, the grass is warm on your toes and you are ready to plant some flowers, but aren’t sure what to plant to be different from every other garden on your block.
The tipsy pot planter is a great Do It Yourself project anyone can do, with just a few supplies and a bit of a green thumb.
Using these simple steps below, you can create your own primitive tipsy pot planter!
Primitive Tipsy Pot Planter
Project Cost: Under $60.00
Project Level: Medium
Project Supplies: Flowers, Potting soil, Primitive pots, 1/2″ steel conduit |Project Tools: Drill, 1″ hole saw.
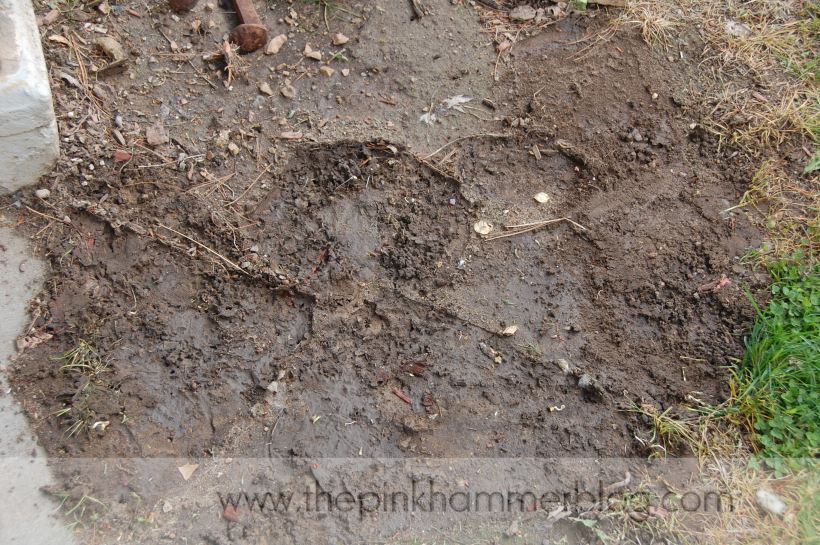
1.) Pick the location where you want your tipsy pot planter. I chose to place mine in a place where the grass has never really grown well, right near my main entrance, which makes a great way to greet guests as they come for a visit.
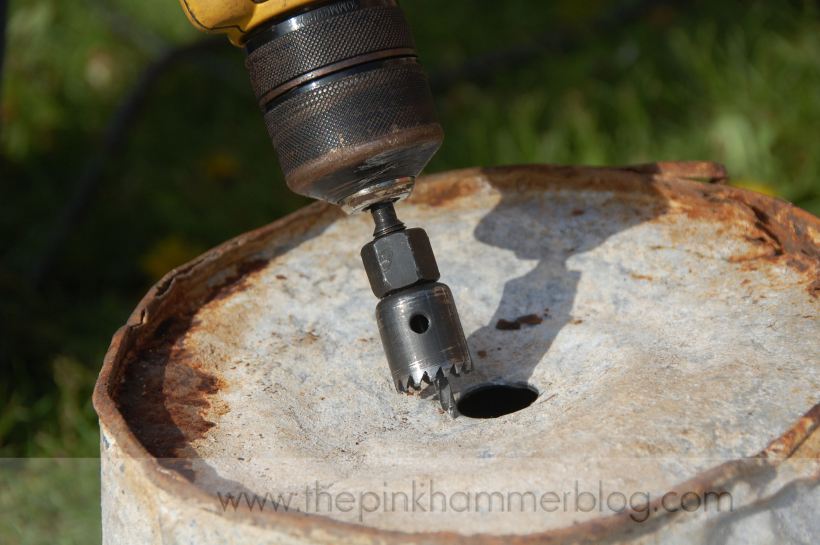
2.) Drill holes into the bottom of each pot. If you are using the 1/2″ conduit, you will need to drill a 1″ hole in each pot. This is what allows the pots to tip from side to side.
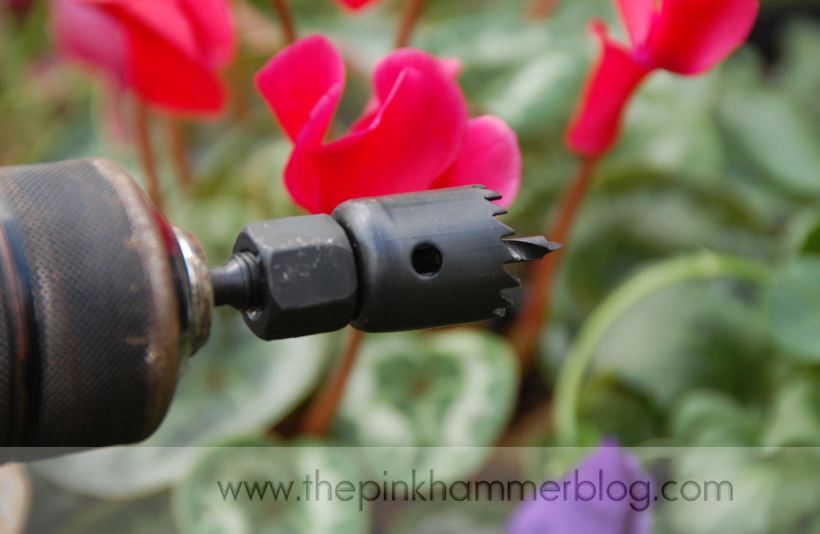
I used a drill with a 1″ hole saw attached.
3.) Place your first, larger pot in the location you desire.
4.) Push your conduit into the ground, through the hole you drilled in the larger pot & fill your pot with potting soil.
5.) Continue stacking your pots, tipping them as you go, along the way. Fill them with dirt and whatever flowers your little heart desires. I mainly use flowers that will grow and eventually drape over the edge of the buckets (ivy, vinca vine, petunias, Calibrachoa etc).
Finished Project:
Your guests (and you) will LOVE walking up to your door and being greeted by such beauty and character, and don’t forget to add a sweet little sign to personalize your new tipsy pot planter :
Tips:
Your steel conduit should be even or below the top tipsy pot, if needed, give it a few good pounds to push it down into the ground farther.
Pack your soil nice and tight into the first pot, as the rest of your pots will be resting right in the larger of all the pots.
The more rust your bucket has, the easier it will be to drill through.
A primitive tipsy pot planter is a great way to upcycle ,(be creative and design your own with whatever you have laying around or find for a good deal at an antique store) and will add beauty and character to your garden and yard, and leave your guests asking ‘How did you do that!?’
Thanks for reading,
~Kelly
*You can also read this blog post in the June issue of Queen of the Castle Magazine online , or pick up a copy at a local business.
*Garden gloves used for this project; Tomboy Tools pink rubber grip gloves. (Just $7.00, to order, email Tracey at tomboytracey@aol.com and please tell her Kelly from The Pink Hammer blog sent you!)


June 1, 2012 at 9:32 am
simply adorable!
June 1, 2012 at 9:39 am
Thank you Mary! 🙂
June 3, 2012 at 6:11 pm
Well, as if a move & family doesn’t keep you busy enough…..look at this wonderful project!
Kari
June 3, 2012 at 8:53 pm
Thanks Kari!!:) T minus 19 days until we move out of this house!! Then the real adventure begins!
June 4, 2012 at 8:48 am
Stunning. Love it.
June 4, 2012 at 8:50 am
Thank you Cheryl 🙂
June 4, 2012 at 7:28 pm
Wow there is an after life for leaking buckets. Best planter I have ever seen. Great job. Bet this could even work for Strawberry plants.
June 6, 2012 at 9:19 pm
Thanks D 🙂 What a great idea-the strawberry plants, I will have to remember that and try it someday soon! 🙂 Thanks for reading!
June 8, 2012 at 4:28 pm
I was going to do this with clay pots but yours is much much nicer – must go find me some old pots now! beautiful job!!
June 10, 2012 at 4:13 pm
Thanks Corrina!
June 10, 2012 at 8:26 am
luv this idea…have some chippy white enamel pots just waiting to become tipsy!!!!
June 10, 2012 at 4:12 pm
Thanks Rhonda! Have fun creating your own tipsy pot planter! Find The Pink Hammer on facebook and make sure to post photos of yours when complete-Id love to see!
June 10, 2012 at 11:41 am
Thank you for sharing your whimsical planter with us……it is rather delightful.
June 10, 2012 at 4:11 pm
Thanks for reading mikie!
June 12, 2012 at 4:25 pm
That is just a fun and creative idea! I love a little whimsy in the garden!
June 12, 2012 at 6:30 pm
Thank you! Whimsy is great! 🙂
June 12, 2012 at 4:38 pm
love it, can’t wait to make one of my own.
June 12, 2012 at 6:29 pm
Hi Jamie! Thanks so much for reading, enjoy creating your own tipsy pot planter-they are so fun to create!
June 12, 2012 at 4:56 pm
Just popped over from Inspred by Charm, and I am loving this!!! You’ve made this project look so easy to put together. I’m keeping my eyes peeled for old metal vessels to create one of my own. Thanks for sharing this great project. I look forward to checking out more of your projects.
June 12, 2012 at 6:29 pm
Hi Carla! So glad to have you visit on my blog! I love having new visitors/readers! If you do create your own tipsy planter, please find The Pink Hammer on facebook and make sure to share your creation with me on there, I would love to see! 🙂
June 12, 2012 at 6:32 pm
Amazing! I’ve got a base, just need to keep my eyes open for more galvanized goodies! Thanks for an amazing project.
June 12, 2012 at 6:34 pm
Hi Melissa!
Thank you for reading! 🙂
June 13, 2012 at 1:39 am
Oh goodness… you have no idea how much I LOVE this! I hope you don’t mind me sharing you on my FB page. Found this through Michael!
Donna
June 13, 2012 at 10:53 am
Found you through Michael at Inspired by Charm. And this planter is absolutely charming! Yard sales here I come a lookin’ for the perfect vessels. Now to read through the rest of your blog!
Pingback: Pinterest Wednesday! | Because (I Think) I Can
June 16, 2012 at 2:27 pm
Stumbled upon this and love it!!! I had been collecting old pails for years. They sat in my basement just waiting for the perfect project! I completed mine yesterday. LOVE it!!! Even my husband and son were thrilled with the look.
June 18, 2012 at 4:56 pm
Hi Kelly, love this! Do you drill the holes in the center on ALL buckets…or to one side or the other?
June 18, 2012 at 5:03 pm
Hi! Thanks for readong!:)
Drill the holes in the center of each bucket.
Making the hole a bit bigger than conduit is ehat allows
the pots to be tipsy!:)
June 27, 2012 at 8:53 pm
Love this so much, I couldn’t wait to find rusty buckets. I actually found one, but I bought the tub and another bucket at a farm supply store. For the top I wanted to use a metal watering can and I found one at a flea market that had flowers painted on it and I tipped that to make it look like it was watering the planter. It turned out perfect. Thanks for an awesome inspiration.
June 28, 2012 at 8:47 am
Jill, any way you can post a pic? Your’s sounds great!
June 28, 2012 at 10:01 am
Would like to but I don’t know how to this site. Try this link to flickr:
July 13, 2012 at 8:13 am
I love, love, love your pretty planters and I’m collecting tins like yours to make my own! I do hope they turn out as lovely as yours are! I’ve got this linked to my planters post as well today, for inspiration!
July 15, 2012 at 2:08 pm
I love this planter. I particularly like the idea of several containers in a vertical space rather than horizontal. Fantastic!
July 18, 2012 at 12:07 pm
Thank you Shannon! 🙂
July 19, 2012 at 10:15 pm
THis really gives me ideas, growing strawberrys, flowers, etc. Thank you
August 2, 2012 at 4:46 pm
Great Idea! I’m lovin’ this tower idea for my old rusty bucket collection…..might start with strawberries.
August 2, 2012 at 5:04 pm
Oh ! how wonderful your new creation is !!!
Just Unbelievable!!!
August 2, 2012 at 6:23 pm
I love this, and am so glad the “Two Women with a Hoe” shared it on Facebook!! I’m going to try making one, though perhaps not till next year, as everything is burning up here in Kansas this summer!
August 3, 2012 at 3:13 pm
Thank you a lot for sharing this with all people you really recognise what you’re speaking approximately! Bookmarked. Kindly additionally discuss with my web site =). We may have a hyperlink exchange agreement between us
August 3, 2012 at 9:39 pm
Reblogged this on The Adventures of Thrive Farm.
August 18, 2012 at 2:13 am
Love this idea. I am doing this for sure next spring. Being a rusty old lady I have lost of rusty old buckets to make it and a rusty old husband to help me. I like the idea to put a watering can on top and I just happen to have one of those laying around. Thanks again for the idea and the instructions on how to do it. I never could have figured that out. Learn something new every day.
August 31, 2012 at 11:36 am
This is such a fun and beautiful project. Thanks so much for sharing your tutorial!
~Erin
Neaten Your Nest
Pingback: Top 12 blog posts of 2012 | First year in review « The Pink Hammer Blog
December 26, 2012 at 8:14 pm
Just fantastic. Can’t wait til spring.
January 9, 2013 at 2:56 pm
This unique posting, “Primitive tipsy pot planters | DIY
Rustic garden decor. � The Pink Hammer Blog” was in fact superb.
I’m printing out a copy to present to my personal
close friends. Thanks a lot-Edna
January 19, 2013 at 11:46 pm
Oh my! I can’t wait to try! I was wondering if a good long stick of bamboo or other wood might work instead of the rebar? I have a neurological condition leaving me permanently disabled. I have to steer clear from heavy metals and wonder if the metal in the rebar might be a problem if I grew edibles in it. Just wondering if the bamboo would be strong enough to hold if far enough into ground?
January 21, 2013 at 2:32 pm
Hello! Yes I absolutely think something like bamboo or a wood dowel would work, just make sure it is far enough in the ground to hold strong.
Good luck! 🙂
February 18, 2013 at 10:06 pm
Love these pots! Thank you!
February 19, 2013 at 4:50 pm
Me gusta mucho la idea, lo hare en Bs As, Argentina. (I love the idea, I am going to do it at home in B.A., Argentina. Sorry about my English)
February 22, 2013 at 3:55 pm
Very nice!
February 25, 2013 at 6:49 pm
I am a newbie to Pinterest and that is where I had the thrill to see this amazing planter idea!!! I have an old copper tub that has been in my family forever and some other metal flat wash pans & a watering can that I will “display” my annuals this year. I will use the watering can at the top and have flowers “pouring out into the others below! You are such a great source of inspiration and a breath of fresh Spring air!!! ;-)))
February 27, 2013 at 2:36 pm
I personally needed to present this particular blog, “Primitive tipsy pot planters | DIY Rustic garden decor.
| The Pink Hammer Blog” skidki-goroda together with my own buddies on twitter.
I actuallysimply just needed to distribute your very good publishing!
Regards, Ingrid
March 2, 2013 at 3:20 pm
I’m so glad you linked this up, Kelly! It’s beautiful! Great tutorial too! I’m including a link back in this week’s highlights. I’m ready to think spring and this is such an inspiration! 🙂
March 8, 2013 at 12:15 pm
Thank you!!! :):)
Pingback: How to Make Your Garden Unique with Tipsy Pot Planters
Pingback: Crafty Crafts - Momcaster's Weekly Crafty Faves
Pingback: AliLily | Flower Planter Ideas Round Up and Link Party
April 2, 2013 at 11:38 am
Adorable idea!!!! You are so clever!!!!
April 3, 2013 at 12:55 pm
Thank you Cheryl! 🙂
May 7, 2013 at 7:25 am
Thank you so much for the instructions on the Tipsy Pot…they were flawless! I made mine yesterday and it came great, I am so proud of it! It took some searching around the Antiques Fair for buckets, a piece of rebar from the hardware store and beautiful flowers from Home Depot! Viola!
Pingback: In Bloom “Pinspiration” | Confetti & Buttercream
May 28, 2013 at 1:05 am
Hello, I just acquired quite a collection of older galvanized buckets and small troughs. I really like your version of the topsy turvy pots planter. I do not have a drill to make the larger holes that you used. Perhaps, I could use a large mail to pound a hole into them. I just do not want to damage the already weak bottoms. What would you suggest?
June 10, 2013 at 2:12 pm
What is a 1/2″ conduit?
June 12, 2013 at 10:36 pm
Here you go Polly; http://www.homedepot.com/p/Allied-Tube-Conduit-1-2-in-x-10-ft-Electric-Metallic-Tube-Conduit-101543/100400405
Pingback: 17 Rad Ideas for Container Gardening | Stewart Landing Co.
June 19, 2013 at 8:39 pm
Thank you for the great instructions on the tipsy pot. I just moved into a new place and I want to enhance the front. This is a great idea.
July 2, 2013 at 11:16 am
Thank you!!! 🙂 Enjoy creating them!
June 20, 2013 at 1:23 pm
Can someone please tell me where to go to get these pots?
July 2, 2013 at 11:16 am
Hi Darleen! Check your local Junk/antique stores, flea markets , garage sales, etc IF you can no find any no matter where you look, you may purchase them from me (for the cost of pots + shipping from Wisconsin) Thanks!
Pingback: Primitive tipsy pot planter | DIY Upcyle / In The Garden | Endless Acres Farmtiques